![]()
![]()
Frequently Asked Questions / Help
Group Set-up
 Delete or Temporarily Remove Participants
1) Delete Participants:
- Go to the Layout Screen and long tap on any icon
- Tap the garbage can at the bottom of the pop-up to delete the participant
- *Note: You can delete a participant at any time before or even during the mapping
2) Remove Participants from a mapping session, meeting, or lesson:
- To remove a participant from the mapping screen without deleting him/her from the overall group, simply pull the icon to the bottom of the layout screen.
- When in the mapping screen (even when your class or meeting is recording) return to the layout screen by tapping the “Settings” button in the top right corner of the mapping screen:

- Select “Edit Group Layout”
- To remove a participant simply slide the icon to the bottom tray.
- You can also move any of the icons or add additional participants, even while the meeting is still be recorded and the visual mapping will adjust accordingly.
- Once complete, tap “Done” and you will return to the mapping screen.
 2
2
 0
0
![]()
Create Class Lists that you can easily import for any lesson, meeting or group activity:
Part I- Create your class list:
- Go to the main menu of Equity Maps and tap “Create a New Map”.
- Create a name for the class (for example ‘Block 4 History’) and enter all of the students by gender.
Part II- Import at anytime from your Class List:
- Each time you hold a Socratic Seminar, discussion, class, or group activity, go to main menu and tap “Create a New Map”;
- Create a Name for that day’s activity and select the room layout, or the Yellow Class for open seating; Tap Done.
- Select, “Import from an Existing Group”;
- Select the class name to import- (for example ‘Block 4 History)
- Slide the day’s participants into place from the class icons at the bottom;
- Long-tap on students to adjust some of the icon colors according to their clothes, to make the mapping even easier;
- Tap Done and You’re ready to map the group!
By setting up the participants ahead of time, you can easily create groups or map specific lessons.

2
0
How to Import from a .txt File
- Create a .txt file using “Notes” on your iPad in the following format:
- First Name, Last Name, Gender, Email
- Gender: M, F, NB
- Example: Billie, Wilson, NB, [email protected]
- Download a template <HERE> and open in Word, or on Notes in the iPad
2. Once you’ve created the Notes list, select ![]() and “Send a Copy”
and “Send a Copy” 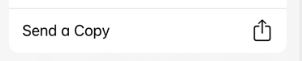
3. Selected “Save to Files” and save “On My iPad” or “iCloud Drive”
4. In the Equity Maps layout screen, select “Import Participants from txt File”

5. When you see the import instructions, select “OK” and select the Folder and File from step 3.
6. You’re ready to map!
0
3
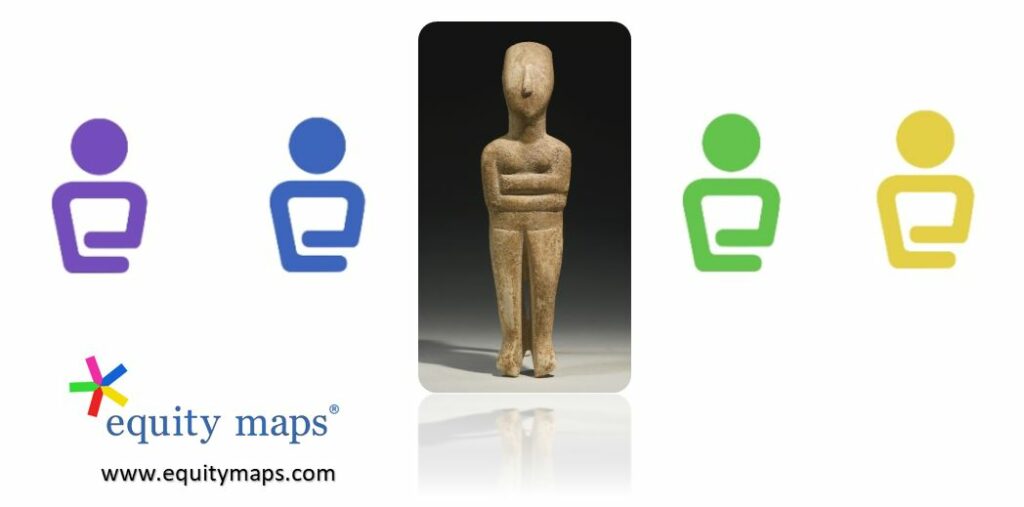
Yes. Participants can choose female, male, or non-binary. Additionally, users can choose from among the following roles: student, participant, facilitator, presenter, or teacher.
The non-binary icon was designed from the home of Socrates in Athens, Greece and based on ancient Cycladic figurines dating from ca 2500 BC. Our icon was inspired by a Greek artist who once told me when I ask about one of her designs based on the same Cycladic statue, “It’s human, neither male nor female, simply human.” – Dave Nelson, Founder of Equity Maps is an avid traveler, teacher, and historian who finds design and thought inspirations in cultures from all around the world.
 2
1
2
1
Create Group Lists that you can easily import for any lesson, meeting or activity:
It is super easy to import from an existing group that you’ve created! The current version of Equity Maps does not have the ability to import the participants from an external file, although this feature will appear in future versions.
Part I- Create your class list:
- Go to the main menu of Equity Maps and tap “Create a New Map”.
- Create a name for the class (for example ‘Block 4 History’) and enter all of the students.
Part II- Import at anytime from your Class List:
- Each time you hold a Socratic Seminar, discussion, class, or group activity, go to main menu and tap “Create a New Map”;
- Create a Name for that day’s activity and select the room layout, or the Yellow Class for open seating or Red for adjustable seating; Tap Done.
- Select, “Import from an Existing Group”;
- Select the class name to import- (for example ‘Block 4 History)
- Slide the day’s participants into place from the class icons at the bottom;
- Long-tap on students to adjust some of the icon colors according to their clothes, to make the mapping even easier;
- Tap Done and You’re ready to map the group!
By setting up the participants ahead of time, you can easily create groups or map specific lessons.
1
1
Standard Version – You can add up to 20 participants to your classroom or meeting.
Premium Version- Add up to 40 participants to your classroom or meeting.
Remember that as you add more students or participants, you can shrink the size of the icon![]() s according to the make-up and arrangement of your group. Simply use the zoom control in the layout screen to shrink or enlarge the icons:
s according to the make-up and arrangement of your group. Simply use the zoom control in the layout screen to shrink or enlarge the icons:

1
1
Deleting Group or Session
Delete or Temporarily Remove Participants
1) Delete Participants:
- Go to the Layout Screen and long tap on any icon
- Tap the garbage can at the bottom of the pop-up to delete the participant
- *Note: You can delete a participant at any time before or even during the mapping
![]()
2) Remove Participants from a mapping session, meeting, or lesson:
- To remove a participant from the mapping screen without deleting him/her from the overall group, simply pull the icon to the bottom of the layout screen.
- When in the mapping screen (even when your class or meeting is recording) return to the layout screen by tapping the “Settings” button in the top right corner of the mapping screen:
- Select “Edit Group Layout”
- To remove a participant simply slide the icon to the bottom tray.
- You can also move any of the icons or add additional participants, even while the meeting is still be recorded and the visual mapping will adjust accordingly.
- Once complete, tap “Done” and you will return to the mapping screen.
![]()
2
0
Mapping Screen
Delete or Temporarily Remove Participants
1) Delete Participants:
- Go to the Layout Screen and long tap on any icon
- Tap the garbage can at the bottom of the pop-up to delete the participant
- *Note: You can delete a participant at any time before or even during the mapping
![]()
2) Remove Participants from a mapping session, meeting, or lesson:
- To remove a participant from the mapping screen without deleting him/her from the overall group, simply pull the icon to the bottom of the layout screen.
- When in the mapping screen (even when your class or meeting is recording) return to the layout screen by tapping the “Settings” button in the top right corner of the mapping screen:
- Select “Edit Group Layout”
- To remove a participant simply slide the icon to the bottom tray.
- You can also move any of the icons or add additional participants, even while the meeting is still be recorded and the visual mapping will adjust accordingly.
- Once complete, tap “Done” and you will return to the mapping screen.
![]()
2
0
—